Pages

Showing posts with label Javascript. Show all posts

Monday, February 4, 2019

Download an excel file after clicking a button posting a json

So my applications display as a nice table the data stored in a database. After filtering and highlighting the displayed data, the users of my applications want to download some selected columns of the table as an excel file. I use very simple solution. Upon clicking a button, the visible contents of the table are posted via ajax to the backend as a two-dimensional array in the json format. When the ajax response is received, the second ordinary http GET request is made to download the excel file generated with Apache POI from the posted data.

My RESTEasy-based backend REST resource class:

@Path("/excel")
@Produces(APPLICATION_JSON_UTF8)
public class ExcelResource {

    @Context
    HttpServletRequest req;
    static String DATA_SESSION_ATTRIBUTE = "DATA_SESSION_ATTRIBUTE";

    @POST
    @Consumes(MediaType.APPLICATION_JSON)
    public void postData(List<List<String>> rows) throws SQLException, IOException, ParseException {
        req.getSession().setAttribute(DATA_SESSION_ATTRIBUTE, rows);
    }

    @GET
    @Produces(MediaType.APPLICATION_OCTET_STREAM)
    public Object getExcel() throws SQLException, IOException, ParseException {
        List<List<String>> rows = (List<List<String>>) req.getSession().getAttribute(DATA_SESSION_ATTRIBUTE);
        return Response.ok(new Excel().convert(rows))
                .header("content-disposition", "attachment; filename = export.xlsx").build();
    }
}

The REST resource uses auxilliary class Excel. For the sake of simplicity I show a short class producing excel files with plain text without any colors:

public class Excel {

    public StreamingOutput convert(List<List<String>> rows) throws FileNotFoundException, IOException, SQLException {
        return new StreamingOutput() {
            public void write(OutputStream out) throws IOException {
                Workbook wb = new XSSFWorkbook();

                Sheet sheet = wb.createSheet("Data");
                for (int r = 0; r < rows.size(); r++) {
                    List<String> sourceRow = rows.get(r);
                    Row row = sheet.createRow(r);
                    for (int c = 0; c < sourceRow.size(); c++) {
                        Cell cell = row.createCell(c);
                        cell.setCellValue(sourceRow.get(c));
                    }
                }

                wb.write(out);
            }
        };
    }
}

The Javascript part is as simple. The value of each td cell is contained inside a div element (because it is easier to manipulate div css properties such as dimensions in response to user actions). Here is a method converting the selected columns of the HTML table into a two dimensional array. Jquery html() method can be used instead of text() to retain the user-generated tags (e.g. html bold tag labeling some search string matches).

                function getSelectedColumns() {
                    var $headers = $resultTable.find('thead th').filter('.' + constants.SELECTED_HEADER);
                    if (!$headers.length) // nothing is selected
                        $headers = $resultTable.find('thead th');
                    var columnIndexes = [];
                    var rows = [];
                    var row = [];
                    for (var i = 0; i < $headers.length; i++) {
                        var $header = $headers.eq(i);
                        console.log($header.text() + "; " + $header.index());
                        columnIndexes.push($header.index());
                        row.push($header.text());
                    }
                    rows.push(row);
                    var $tableRows = $resultTable.find('tbody tr');
                    for (var i = 0; i < $tableRows.length; i++) {
                        var row = [];
                        var $rowTds = $tableRows.eq(i).find('td div');
                        for (var c = 0; c < columnIndexes.length; c++) {
                            var $div = $rowTds.eq(columnIndexes[c]);
                            row.push($div.text());
                        }
                        rows.push(row);
                    }
                    excel.send(rows);
                }

The array is passed to a short require.js module Excel that posts the json, and upon receiving the response triggers the generated file download by changing window.location:

define(['jquery'],
        function ($) {
            return  function  ( ) {
                this.send = function (params) {
                    $.ajax({
                        method: "POST",
                        url: "api/excel",
                        data: JSON.stringify(params),
                        processData: false,
                        contentType: 'application/json'

                    })
                            .done(onLoaded); 

                };

                function onLoaded( ) {
                    window.location = "api/excel";
                }
            };
        });

Sunday, February 18, 2018

Using Backbone Model to post its attributes together with files as multipart form data

Backbone is a tiny and very flexible library for REST-based front end such as single page applications. But I did not find many examples of how to save a model containing both text values and selected files. As the data contains files, it has to be encoded as multipart form data including binary files and the text attributes in json format. A possible short Javascript code in the Backbone model is quite simple:

Backbone.Model.extend({
selectedFiles: [], // the photos to be uploaded
  
saveMultipart: function () {
    var formData = new FormData();
    selectedFiles.forEach(function (photo) {
        formData.append('photo', photo, photo.originalNameSize.nameWithoutExtension);
    });
    formData.append('dataObject', JSON.stringify(this.toJSON( )));
    var options = {
        data: formData,
        contentType: false
    };
    this.save(null, options);
}
// other useful functions
            
});

To submit the model together with the files stored in selectedFiles, method saveMultipart should be called instead of the usual save.

In a JAX-RS-based REST backend the json is extracted from the part arbitrarily named here dataObject and parsed into java classes, whereas the files from the remaining parts are processed in some other way.

A working sample application that is not at all Backbone-based but includes also an example of such a Backbone model-based data submission is stored here. It will be described in more detail in a post about client-side image resizing and uploading them to REST resources.

Monday, January 22, 2018

Google Sign in into a website using redirect ux_mode

Google Javascript client library used for sign in is built on the OpenID Connect protocol, which is straightforward. The library uses the implicit flow whereby tokens are passed in url hash. It is not a good option for server side authentication. It differs from a less complicated basic/server flow in which tokens are passed as url parameters. The server flow I describe in a separate post.

Google Sign-In for Websites documentation provides only examples where users sign in via a Google popup. I adapted their code so that another redirect, which is another consent flow option, is used. I also added a primitive backend code that process the ID token. In my sample web application saved to GitHub, the entire consent flow happens in one window without any popups because the initialization is launched with following parameters:

gapi.auth2.init({
            client_id: clientId,
            fetch_basic_profile: false, 
            scope: 'email',
            ux_mode: 'redirect', 
            redirect_uri: 'http://localhost:8080/test/' 
        })

The application can be deployed to Tomcat or anywhere, but first a client id should be generated in google API console and copied to Constants class.

For the unauthenticated users the welcome page displays only the standard Google Sign-In button that meets the strict Google branding guidelines.

On clicking the button the browser is redirected to Google authentication page.

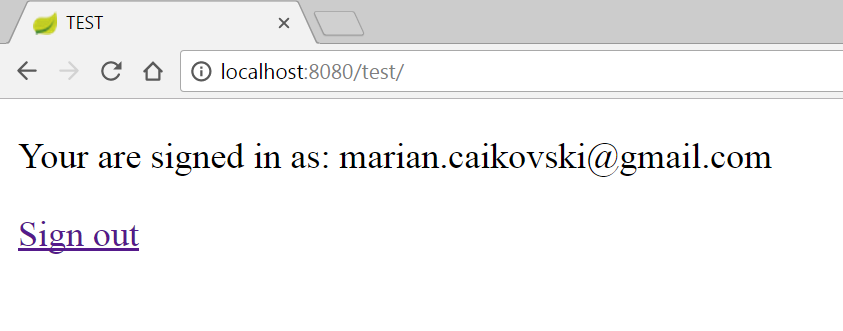
If the user has only one account in Google and he is already signed in, he is immediatly redirected by to the original page. Otherwise, the user has to select with what account to sign in and then upon authentication, the user is redirected back to the original page. To imitate a complete process of authentication, the page forwards the received from google ID token to the REST resource in the Java backend. The backend process the id, and sends back a JSON with the user's email. So for the authenticated users the only page displays their email received from the Java backend and a link for signing out.

Thursday, January 18, 2018

Resizing selected pictures a browser before uploading them to a REST resource in a backend

The sample application uploads multipart data comprising data from several text inputs together with several photo files select in file type input to a JAX-RS rest resource. Note, multipart data is not mentioned in JAX-RS specification. So the back end uses RESTEasy-specific features. Before uploading, the files are resized in the browser. Then, they are scaled down to thumbnails in the back end.

The web application is adapted for Wildfly, but it works as well with Tomcat if the scope of RESTEasy-related dependencies is changed from provided to the default by removing it.

How to style a file input

The input will accept multiple but only images. One cannot change much the file type input. A workaround is to use a label tag and hide the input with css. Note, the ugly styling here serves merely to demonstrate that styling is possible.

<label id='dropbox' for='fileInput'><img src="imgs/File-Upload-icon.png"/>Select photos</label>
<input id='fileInput' type="file" accept="image/*" multiple />

A sample css:

input[type=file] {
    display: none;
}
label img {
    max-height: 1.5em;
}

label {
    border: 1px solid;
    display: inline-block;
    padding: 0.3em;
}
Resizing selected files using canvas and its function onBlob

The unique resized files are stored in an array:

var selectedFiles = []; // the array with the unique resized files that will be uploaded

When new pictures are selected using the file input, a change event listener is invoked:

$('input[type=file]').change(function () {
    resizeAndShowThumbs(this.files);
});
function resizeAndShowThumbs(files) {
    for (var c = 0; c < files.length; c++) {
        var file = files[c];
        if (file.type.startsWith("image/") && isFileNotYetIncluded(file)) {
            resize(file, showThumb);
        }
    }
}
function isFileNotYetIncluded(file) {
    for (var c = 0; c < selectedFiles.length; c++) {
        if (selectedFiles[c].originalNameSize.equals(file)) { // file has name and size read-only properties
            return false;
        }
    }
    return true;
}

The event listener calls the resize function only if a file is not yet included in the array. The files are identified by their names and initial sizes. After a file is resized the callback showThumb is called.

function showThumb(file) {
    selectedFiles.push(file);
    showMessage();
    $previewList.append('<li><p>' + file.originalNameSize.name + '</p><img src="' + URL.createObjectURL(file)
            + '"  onload="window.URL.revokeObjectURL(this.src);"/></li>');
}

The resized picture have jpeg compression. The problem with resizing is that sometimes a resized jpeg-compressed file is has a bigger size than the source file with bigger dimensions. So the file with smaller size is selected between the source and resized files. On the back-end the pictures are converted into thumbnails using ImageIO class, which accepts only jpg, bmp, gif, png formats. In the unlikely case of the source file having an unacceptable format, the resized jpeg file will be uploaded even if it is bigger.

var MAX_SIZE = 1200, MIME = 'image/jpeg', JPEG_QUALITY = 0.95;
// the files types accepted by java ImageIO
var acceptableTypes = ["image/gif", "image/png", "image/jpeg", "image/bmp"]; 

function size(size) {
    var i = Math.floor(Math.log(size) / Math.log(1024));
    return (size / Math.pow(1024, i)).toFixed(2) * 1 + ['b', 'kb', 'Mb'][i];
}

function resizePhoto(file, callback) {
    var image = new Image();
    image.onload = function ( ) {
        URL.revokeObjectURL(this.src);
        var canvas = document.createElement('canvas');
        var width = this.width;
        var height = this.height;

        if (width > height) {
            if (width > MAX_SIZE) {
                height *= MAX_SIZE / width;
                width = MAX_SIZE;
            }
        } else {
            if (height > MAX_SIZE) {
                width *= MAX_SIZE / height;
                height = MAX_SIZE;
            }
        }

        canvas.width = width;
        canvas.height = height;
        canvas.getContext('2d').drawImage(image, 0, 0, width, height);
        canvas.toBlob(callback.bind(null, this.width, this.height, width, height), MIME, JPEG_QUALITY);
    };
    image.src = URL.createObjectURL(file);
}


function chooseSmallerFile(file, resizedFile) {
    if (file.size > resizedFile.size) {
        console.log('the resized file is smaller');
        return resizedFile;
    } else {
        // resized is bigger than the original
        // however, java ImageIO supports only  jpg, bmp, gif, png, which perferctly match mime types, the front-end should send only those types
        // if the file type is none of image/gif, image/png, image/jpeg, image/bmp use the bigger resized file
        console.warn('resized is bigger the the original');
        if (acceptableTypes.indexOf(file.type) >= 0) {
            return file;
        } else {
            console.warn('but the source file type is unacceptable: ' + file.type);
            return  resizedFile;
        }
    }
}

 function resize(file, callback) {
    resizePhoto(file, function (originalWidth, originalHeight, resizedWidth, resizedHeight, resizedFile) {
        console.log('filename=' + file.name + '; size=' + size(file.size) + '=>' + size(resizedFile.size)
                + '; dimensions=' + originalWidth + '/' + originalHeight + '=>' + resizedWidth + '/' + resizedHeight);
        var smallerFile = chooseSmallerFile(file, resizedFile);
        smallerFile.originalNameSize = new NameAndSize(file.name, file.size); // name is erased in the resized file. the name and size are used to select unique files
        callback(smallerFile);
    });
};

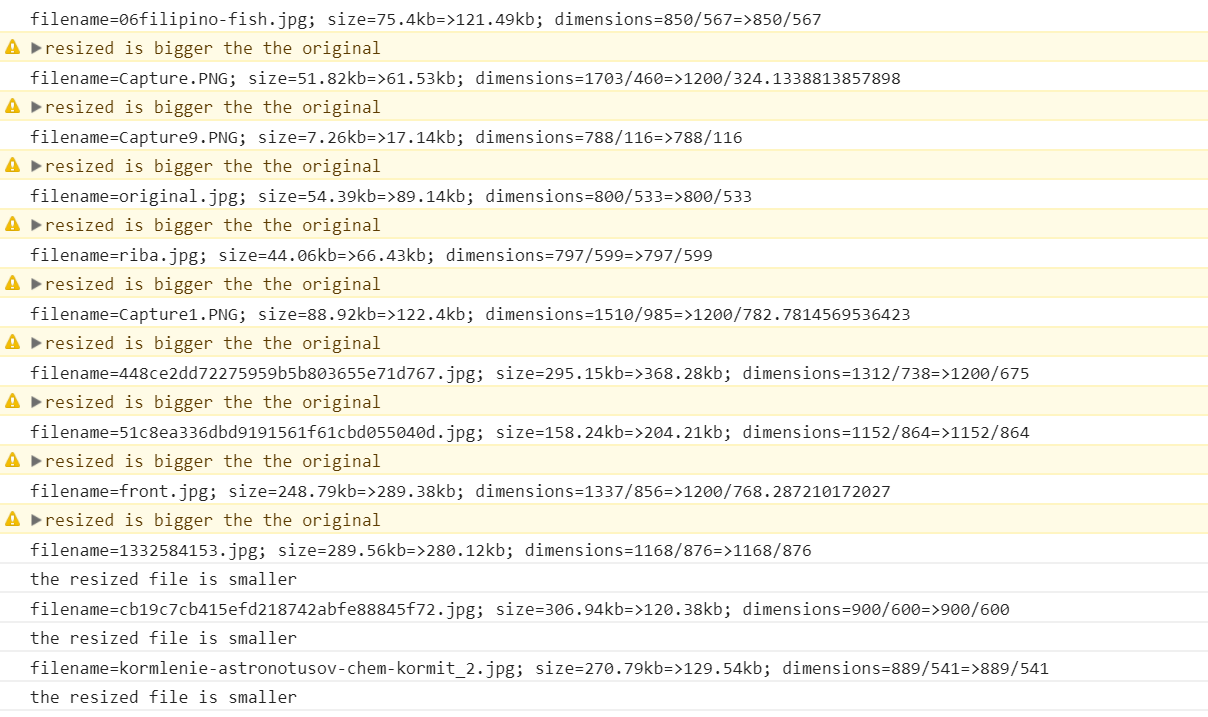
The resizing code produces in the console lots of file size related debug messages. For example, when many pictures coming from different sources are selected:

The console messages indicate that sometimes it is cheaper to upload the original file with the bigger dimensions:

Dragging and dropping photos

Instead of clicking the file input label, one can drop on it the files dragged from any file browser. To implement drag and drop, only few lines are required:

$('#dropbox').on("dragenter", onDragEnter).on("dragover", onDragOver).on("drop", onDrop);

function onDragEnter(e) {
    e.stopPropagation();
    e.preventDefault();
}

function onDragOver(e) {
    e.stopPropagation();
    e.preventDefault();
}

function onDrop(e) {
    e.stopPropagation();
    e.preventDefault();
    resizeAndShowThumbs(e.originalEvent.dataTransfer.files);
}

How the resized photos together with values from other inputs can be posted as multipart form data to a REST resource is described in a separate post, because this one would be to long.