Pages

Showing posts with label REST. Show all posts

Monday, February 4, 2019

Download an excel file after clicking a button posting a json

So my applications display as a nice table the data stored in a database. After filtering and highlighting the displayed data, the users of my applications want to download some selected columns of the table as an excel file. I use very simple solution. Upon clicking a button, the visible contents of the table are posted via ajax to the backend as a two-dimensional array in the json format. When the ajax response is received, the second ordinary http GET request is made to download the excel file generated with Apache POI from the posted data.

My RESTEasy-based backend REST resource class:

@Path("/excel")
@Produces(APPLICATION_JSON_UTF8)
public class ExcelResource {

    @Context
    HttpServletRequest req;
    static String DATA_SESSION_ATTRIBUTE = "DATA_SESSION_ATTRIBUTE";

    @POST
    @Consumes(MediaType.APPLICATION_JSON)
    public void postData(List<List<String>> rows) throws SQLException, IOException, ParseException {
        req.getSession().setAttribute(DATA_SESSION_ATTRIBUTE, rows);
    }

    @GET
    @Produces(MediaType.APPLICATION_OCTET_STREAM)
    public Object getExcel() throws SQLException, IOException, ParseException {
        List<List<String>> rows = (List<List<String>>) req.getSession().getAttribute(DATA_SESSION_ATTRIBUTE);
        return Response.ok(new Excel().convert(rows))
                .header("content-disposition", "attachment; filename = export.xlsx").build();
    }
}

The REST resource uses auxilliary class Excel. For the sake of simplicity I show a short class producing excel files with plain text without any colors:

public class Excel {

    public StreamingOutput convert(List<List<String>> rows) throws FileNotFoundException, IOException, SQLException {
        return new StreamingOutput() {
            public void write(OutputStream out) throws IOException {
                Workbook wb = new XSSFWorkbook();

                Sheet sheet = wb.createSheet("Data");
                for (int r = 0; r < rows.size(); r++) {
                    List<String> sourceRow = rows.get(r);
                    Row row = sheet.createRow(r);
                    for (int c = 0; c < sourceRow.size(); c++) {
                        Cell cell = row.createCell(c);
                        cell.setCellValue(sourceRow.get(c));
                    }
                }

                wb.write(out);
            }
        };
    }
}

The Javascript part is as simple. The value of each td cell is contained inside a div element (because it is easier to manipulate div css properties such as dimensions in response to user actions). Here is a method converting the selected columns of the HTML table into a two dimensional array. Jquery html() method can be used instead of text() to retain the user-generated tags (e.g. html bold tag labeling some search string matches).

                function getSelectedColumns() {
                    var $headers = $resultTable.find('thead th').filter('.' + constants.SELECTED_HEADER);
                    if (!$headers.length) // nothing is selected
                        $headers = $resultTable.find('thead th');
                    var columnIndexes = [];
                    var rows = [];
                    var row = [];
                    for (var i = 0; i < $headers.length; i++) {
                        var $header = $headers.eq(i);
                        console.log($header.text() + "; " + $header.index());
                        columnIndexes.push($header.index());
                        row.push($header.text());
                    }
                    rows.push(row);
                    var $tableRows = $resultTable.find('tbody tr');
                    for (var i = 0; i < $tableRows.length; i++) {
                        var row = [];
                        var $rowTds = $tableRows.eq(i).find('td div');
                        for (var c = 0; c < columnIndexes.length; c++) {
                            var $div = $rowTds.eq(columnIndexes[c]);
                            row.push($div.text());
                        }
                        rows.push(row);
                    }
                    excel.send(rows);
                }

The array is passed to a short require.js module Excel that posts the json, and upon receiving the response triggers the generated file download by changing window.location:

define(['jquery'],
        function ($) {
            return  function  ( ) {
                this.send = function (params) {
                    $.ajax({
                        method: "POST",
                        url: "api/excel",
                        data: JSON.stringify(params),
                        processData: false,
                        contentType: 'application/json'

                    })
                            .done(onLoaded); 

                };

                function onLoaded( ) {
                    window.location = "api/excel";
                }
            };
        });

Thursday, February 1, 2018

Configuring Jackson object mapper in RESTEasy

While transforming between Java classes and JSON, Jackson library considers both its own annotations and the conventional JAXB annotations. The final result maybe not obvious. Let's consider a sample class from a sample application:

@XmlRootElement
@XmlAccessorType(XmlAccessType.PUBLIC_MEMBER)
public class MyBean {

    String firstName, lastName, fullName;

    public MyBean(String firstName, String lastName) {
        this.firstName = firstName;
        this.lastName = lastName;
    }

    public MyBean() {
    }

    @XmlElement(name = "jaxbFirstName")
    public String getFirstName() {
        return firstName;
    }

    public void setFirstName(String firstName) {
        this.firstName = firstName;
    }

    @JsonProperty("jacksonLastName")
    public String getLastName() {
        return lastName;
    }

    public void setLastName(String lastName) {
        this.lastName = lastName;
    }

    @XmlElement(name = "jaxbFullName")
    @JsonProperty("jacksonFullName")
    public String getFullName() {
        return firstName + " " + lastName;
    }

    public void setFullName(String fullName) {
        this.fullName = fullName;
    }
}

Jackson set up by RESTEasy prefers its own annotations over the JAXB ones. Note, the default object mapper ignores JAXB annotations (see below). The default output of an object mapper will be:

{"jaxbFirstName":"John","jacksonLastName":"Smith","jacksonFullName":"John Smith"}
Configuring Jackson used by JAX-RS

To configure Jackson, one has to provide his own configured instance by means of a context provider implementing ContextResolver interface. The provider produces an ObjectMapper instance (according to the authors it can be reused) that is to be used by JAX-RS. The following class from another sample application provides a object mapper that produces nicely formatted JSON.

public class MyObjectMapperProvider implements ContextResolver {

    ObjectMapper objectMapper = createObjectMapper();

    @Override
    public ObjectMapper getContext(final Class type) {
        return objectMapper;
    }

    ObjectMapper createObjectMapper() {
        ObjectMapper objectMapper = new ObjectMapper();
        objectMapper.enable(SerializationFeature.INDENT_OUTPUT);
        return objectMapper;
    }
}

And the custom provider has to be registered as a singleton:

@ApplicationPath("/api")
public class MyApplication extends Application {

    public MyApplication() {
        singletons = new HashSet<Object>() {
            {
                add(new MyObjectMapperProvider());
            }
        };
        resources = new HashSet<Class<?>>() {
            {
                add(MyResource.class);
            }
        };
    }

    Set<Object> singletons;
    Set<Class<?>> resources;

    @Override
    // note, it is called twice during RESTEasy initialization, 
    public Set<Class<?>> getClasses() {
        System.out.println(">getClasses()");
        return resources;
    }

    @Override
    // note, it is called twice during RESTEasy initialization, 
    public Set<Object> getSingletons() {
        System.out.println(">getSingletons()");
        return singletons;
    }
}

The json received from the service is formatted now:

{
  "firstName" : "John",
  "jacksonLastName" : "Smith",
  "jacksonFullName" : "John Smith"
}

Note, unlike the default Jackson object mapper in RESTEasy, the default Jackson object mapper (created as above ObjectMapper objectMapper = new ObjectMapper() ) does not recognize JAXB annotations.

Enabling JAXB annotations in Jackson object mapper

The customized object mapper instance has to be further configured in the context provider shown above:

    ObjectMapper createObjectMapper() {
        ObjectMapper objectMapper = new ObjectMapper();
        objectMapper.enable(SerializationFeature.INDENT_OUTPUT).registerModule(new JaxbAnnotationModule());
        return objectMapper;
    }

Now JAXB annotations are priveleged over Jackson ones in the produced JSON:

{
  "jaxbFirstName" : "John",
  "jacksonLastName" : "Smith",
  "jaxbFullName" : "John Smith"
}
Disabling unconventional Jackson annotations

The customized object mapper instance has to be further configured in the context provider shown above:

    ObjectMapper createObjectMapper() {
        ObjectMapper objectMapper = new ObjectMapper();
        objectMapper.enable(SerializationFeature.INDENT_OUTPUT).setAnnotationIntrospector(new JaxbAnnotationIntrospector());;
        return objectMapper;
    }

Now Jackson are ignored in the produced JSON:

{
  "lastName" : "Smith",
  "jaxbFirstName" : "John",
  "jaxbFullName" : "John Smith"
}
Ignore empty properties during serialization

Another usefull setting feature preventing nulls and empty collections from being included into resulting json.

public class MyObjectMapperProvider implements ContextResolver {
    
    static ObjectMapper objectMapper = createObjectMapper();

    @Override
    public ObjectMapper getContext(final Class type) {
        return objectMapper;
    }
    
    static ObjectMapper createObjectMapper() {
        ObjectMapper objectMapper = new ObjectMapper();
        objectMapper.enable(SerializationFeature.INDENT_OUTPUT).setAnnotationIntrospector(new JaxbAnnotationIntrospector()).setSerializationInclusion(JsonInclude.Include.NON_EMPTY);
        return objectMapper;
    }
    
    public static ObjectMapper getObjectMapper() {
        return objectMapper;
    }
}

Monday, January 22, 2018

Google Sign in into a website using redirect ux_mode

Google Javascript client library used for sign in is built on the OpenID Connect protocol, which is straightforward. The library uses the implicit flow whereby tokens are passed in url hash. It is not a good option for server side authentication. It differs from a less complicated basic/server flow in which tokens are passed as url parameters. The server flow I describe in a separate post.

Google Sign-In for Websites documentation provides only examples where users sign in via a Google popup. I adapted their code so that another redirect, which is another consent flow option, is used. I also added a primitive backend code that process the ID token. In my sample web application saved to GitHub, the entire consent flow happens in one window without any popups because the initialization is launched with following parameters:

gapi.auth2.init({
            client_id: clientId,
            fetch_basic_profile: false, 
            scope: 'email',
            ux_mode: 'redirect', 
            redirect_uri: 'http://localhost:8080/test/' 
        })

The application can be deployed to Tomcat or anywhere, but first a client id should be generated in google API console and copied to Constants class.

For the unauthenticated users the welcome page displays only the standard Google Sign-In button that meets the strict Google branding guidelines.

On clicking the button the browser is redirected to Google authentication page.

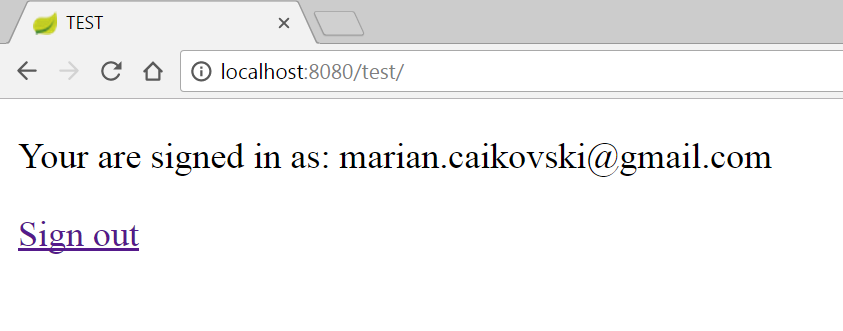
If the user has only one account in Google and he is already signed in, he is immediatly redirected by to the original page. Otherwise, the user has to select with what account to sign in and then upon authentication, the user is redirected back to the original page. To imitate a complete process of authentication, the page forwards the received from google ID token to the REST resource in the Java backend. The backend process the id, and sends back a JSON with the user's email. So for the authenticated users the only page displays their email received from the Java backend and a link for signing out.